The California Beach

The California Beach

Search This Blog

Monday 26 April 2010

Kitchen Pod Being Priced Up

This weekend we really realised how much we need to get the kitchen pod sorted.  When we stopped and camped up, we got all our camping stuff out of their boxes and set our stuff up ready to cook and generally be in camping mode, but each morning we had to pack everything away into their boxes again in order to head off to the beach for some waves, and then unpack again each evening when we returned to the campsite.  It didn't take all that much time but it was quite annoying and we realised that if we were wanting to tour around - as we will do later this year when we head out on our European Tour - we'd be wasting an awful lot of time.  So we have decided to get the kitchen pod sorted as a number one priority on the van.

After about 6 iterations we finally have the design for the pod finished.   We are going for a three door design with two cupboards underneath - one with 2 doors and one with a single door.   On the top is a recessed area for our existing gas hob to drop into, with a flip top lid and opening front and next to that is an area we are planning making into a cutlery holder.   The basic design for the top of the pod was stolen shamelessly from Darran's design off the Brickyard:


Darran's Kitchen Pod being built.  This gave us the basic design for the top

The two lower cupboards will have three shelves each and each of these will be adjustable to give us as much flexibility as possible for storage.


The kitchen pod, final design, closed and opened.

After a chat to a few knowledgable people I have decided to use 12mm plywood for the panels with 2"x1" timber for the frame.  This plywood option is nice and thick and will make the whole cabinet especially robust and solid which is required as we want to be able to take it in and out when packing the van for and after a camping weekend.  Being picked up and ported about the place a lot means we need it to be sturdy.   Especially as the plan would be to carry it in and out of the van with all the camping stuff like the gas hob, gas bottles and pots and pans left inside it.

As for sticking the pod into the van I have been thrashing out all sorts of options.  Bungees, metal rods clamped into tool clips in the wall, and a split baton approach have all been considered and discussed on the BrickYard.  At the moment I'm favouring this neat little clip system suggested by Shapey off BY.  


Trouble is I'm not sure if it will actually work with a flat backed pod and a curvy van wall.   So current plan is to build the pod and then worry about securing it when I'm done.  I can always bungee it in place for travel if the worst comes to the worst.

Due to the cleverness of Google Sketchup I was able to break the design down into exactly what size of bits of wood I need very easily and today I printed them out, popped down to Lawsons with the list and asked for a quote for all the wood, cut to size. Hopefully come the end of the week I'll be able to go and pick it all up and then the actual building can start!

Bude Weekend

This weekend we took the van on a surfari to Cornwall and the town of Bude.   It's about a 5 hour drive down there and we set off after work and arrived just after 10pm.  We stayed at the Bude Holiday Park with about a dozen mates. 

The holiday park itself is big with loads of static caravans, a children's play area, an outdoor heated swimming pool (which we declined to try out) and lots of pitches with and without electrical hook ups.   They had a lot of washing and toilet facilites which were all in pretty good nick.  And they let in groups which most smaller campsites won't.  Plus they let you turn up as late as midnight and check in.   But that's where the good points end. 

The campsite was full of "interesting" people who really should have been wearing burbery, the bar was so bad that we went in there to pay for our stay up front on the Friday night and never went near it again after that, even choosing to pass on watching the Elvis impersonator who couldn't remember the words. And the security guards?  Oh my god.  Nazis.   We've finally found where all the ex-prison camp guards have been retired to.

Anyway, not letting the prison camp guards put a damper on our first night we set up camp and everyone piled into the two T5's we'd taken down for the weekend and had a few beers and talked of how the waves were going to be 3' and glassy this weekend.  Before we knew it the early morning hours were slipping away and it was decided to crash out.

Marshy, another T5 owner and surfer

Saturday dawned cold and cloudy but with no hint of wind.  It might be great down at the beach.  We all piled down there and drove into the car park.   Hmmm.  Not exactly 3'.  More like 18" on a set.  But it was clean enough and if the sun had been out it would have been lovely.   Still about half of us got in the water and had a splash about.   The others set off on a 9 mile trek along the coast path to Crackington Haven.  Some even walked there and all the way back again! 

The gang at Widemouth Beach

We stayed down at the beach all day, doing two sessions and in the afternoon the swell had picked up so we were getting maybe 2' waves on the bigger sets and still pretty clean.  Trouble was it was about 5 to 10 minutes in between sets and with the water at a chilly 9 degrees it was a long wait for each wave. 

That evening it was back to the campsite via Sainsburys and bar-b-que time.  We all huddled in the leigh of the van and made a circle to defend outselves against the prison guards.  

Bar-b-que in the evening...


Fortunately they seemed busy elsewhere in the prison camp this evening and we didn't see them.  It probably helped that the rains started to fall before midnight so everyone beat a hasty retreat and hit the sack before they realised we'd been enjoying ourselves on their watch.   Oh, but not before we'd celebrated Cecile's birthday with a few bottles of champagne and some cakes and candles!


...which became a campfire after dark

Sunday was another cold cloudy day but this time it was blowing a hooly and onshore too.  The swell had picked up to about 3' on the sets but it was very blown out.  Still, we'd come this far and even though the conditions weren't great it was still time to get in there and catch some waves.


Emil

It was a pleasure to the able to change out of my cold wet suit in the back of the van, standing up as we had the roof up, and Mrs. Blakey even greeted me with a fresh cuppa made from our new 12v kettle as I got out of the sea.  Bonus!  


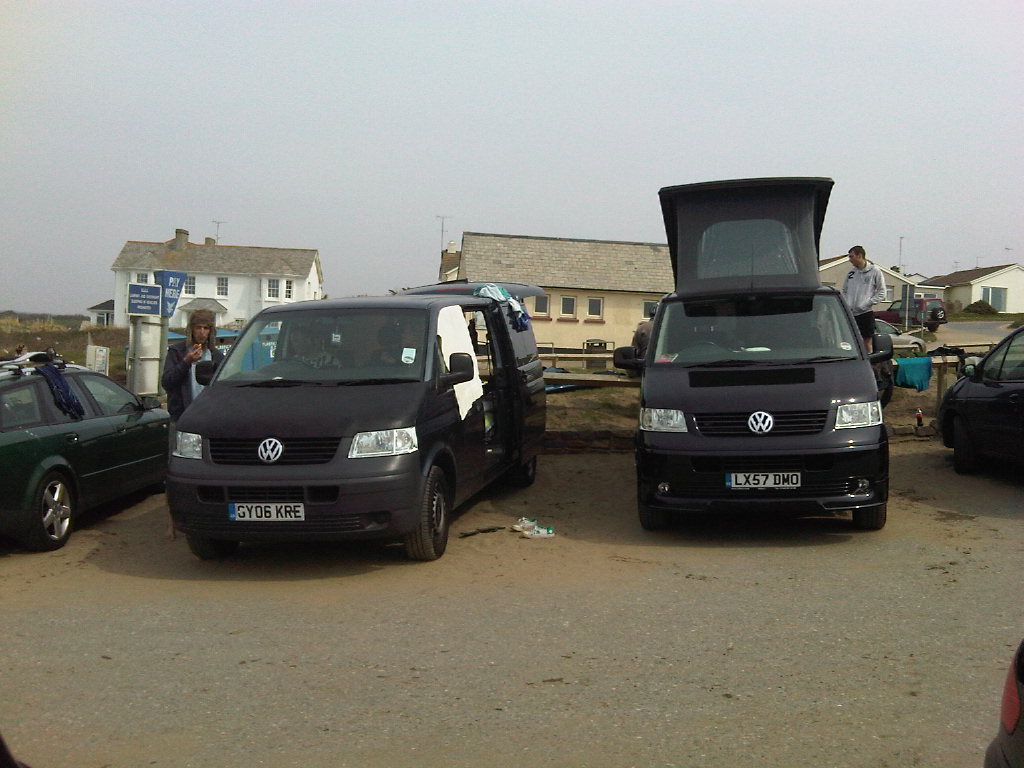
The two T5s side by side

Getting out of a sandy soaking wet suit in the back of the van did mean I left puddles of wet sand everywhere but the practical kombi floor means that a quick sweep through the next day and a damp cloth and it's sparkling like new again.  Very useful.


Local boy Glaz


After our Sunday session we said goodbye to the others and went and visited our great friends Glaz and Frances who live down near Bude and have just had a new baby.  Then we headed off home, dropping in at my sister's pub the Peter Tavy Inn on the edge of Dartmoor where my brother in law delighted in taking the micky out of this blog.   But he's clearly reading it!!!


My sister's pub on Dartmoor

From there it was a simple 4 hour cruise home down the A303 and once again I was pleased at just how easy it is to drive the van for long hours at a stretch.  Got home after 4 hours without a break feeling fresh as a daisy with none of the usual fatigue I'd feel after the same drive in a car.    I do need to invest in cruise control though - I really miss it on the long drives.

All in all a really enjoyable weekend although it would have been even better had the weather stayed as it has been all week.

Oh and as for the campsite, I'm giving them 3/10.  Probably about 6/10 for the campsite itself and -3 for the nazi guards.

Monday 19 April 2010

One Wedding and a Rugby Match

Just back from another weekend in the van.   This time the main event was the wedding of friends of ours down in Shaftsbury, Dorset.  We packed up the van on Saturday morning with the bare necessities - it was only an overnight stay so we hardly needed anything - our table, 2 camping boxes and the cooker.


We headed off to Shaftsbury and parked up at Blackmore Vale campsite, just off the A30.  The owner was a very friendly chap who showedus to the field that serves as the campsite and told us there was no rush to be off in the morning.  Excellent.   A mere £14.50 for two of us, the van and an electrical hook up was a very good price.


We parked up and popped the roof, unpacked the camp boxes and were set up in a little over 10 minutes.  Sweet.  Only us and a caravan on the whole field and we had loads of space to ourselves.  Plus the campsite kindly provides a safari bench with each electrical hook up so we made full use of the extra table and chairs.


This weekend we'd taken a full 240v electric kettle with us and it was a good move.   Easy tea within minutes can't be overestimated!

The weather was amazing this weekend - a complete opposite to our Easter camp and it reminded me just why camping is the best way to spend a weekend when the weather is good.  And as Mrs Blakey was getting ready for the wedding we realised another advantage of a black van with limo tinted windows - a bonus mirror for straightening your hair in!


The wedding was a great event and free champagne all night and a hog roast plus barn dance was a lot of fun.   We got back in the early hours and climbed up into the loft for a comfortable night's sleep.  It was cold again - Mrs Blakey got out in the middle of the night and there was a frost on the ground and on the sides of the van - testament to the quality insulation I think.

We rated the campsite about 6/10.  It was cheap and in a pretty spot, with some heavy road noise as it was just off the A30.  The facilities were old and knackered but at least they were clean and the price was very good.  Value for money was 9/10 and it was perfect for what we wanted - a cheap over night spot - but I'd not have wanted to stay there any longer than a weekend.


Sunday we chilled out in the sunshine with a leisurely breakfast and then packed up and headed off to Bristol for a Championship play off match between Bristol vs Bedford.   Bris won and are in the semi-finals, there were 11 tries in the game and we stood roasting in the sunshine for the whole game.  


Drove home down the M4/M25/M23 and even got a big thumbs up from a passing VW van on the M25, so all in all a top weekend.

Friday 16 April 2010

Kitchen Pod Design Continues

Me and Mrs Blakey have been thrashing out some more details and Google SketchUps of the kitchen pod we want to put in.  We went into the van and came up with a set of dimensions and then redesigned it based around those numbers.   We have decided on adding the gas hob and cutlery draw to the top section, with a hinged door on the top and front of this section, split into two parts.   Below this section the main pod will comprise three sections, each with a door and numerous shelves.  This will lead to lots of smaller compartments which will mean things won't slide about as much.  The shelves will be adjustable with lots of height options to choose from.


The Google SketchUp picture above shows the new design, with from left to right, the kitchen pod all shut up (it's usual state), with it all opened (to show the insides and shelves off) and with it in "cooking mode".

Not 100% finished yet as I'm still not 100% convinced about three sections as this precludes putting bigger items in.  Also, we need to rescale it in terms of how deep it can be, as we have a maximum depth based on our desires to put a Variotech 333 seat system in sometime and this means we can't build this out too far.

Finally, my pal Terry had an idea to build a metal rod into the back of the cabinet and have clamps screwed into the panel of the van so that the metal rod can push back into the clamps and secure it in place.  I believe they use a similar mechanism for holding kitchen furniture in place.  Great idea for letting the pod clip into place neatly and then be removed when no longer camping.  Will also mean no need for slightly messy looking bungees.

Monday 12 April 2010

Kitchen Design

I found Google Sketch today.  Wow.  A cracking piece of free software that's really intuitive and easy to pick up.   I managed to install it, run through the simple tutorial (like all these things this is a must) and then knock up a simple first design for my kitchen pod with it all in my lunch hour.   It's that easy to use.


The design is a simple one with a rectangular cabinet with single internal shelf.  Google Sketch lets you draw things to scale so you can really design something that is going to fit.

I've cut a hole in the top shelf and hinged it.  This is where the cooker will slot. 


Not bad for an hour's work!

Sunday 11 April 2010

Cabinet Reshuffle

This weekend I finally, totally and completely finished the rear cabinet.  Honest.   Back on the 15th January this year I first started to plan and design my rear cabinet and bit by bit I've built, adjusted, improved and tweaked the design and build till I am where I am today.  

When we last saw the cabinet it was "finished" but I still wanted to cover it with a wood effect veneer.   I'm a big fan of oak furniture and my local B&Q had some fablon in light oak which looked a good colour to me, so I snapped up a few rolls.  After reading about Darran's self built kitchen pod I realised I had to also pick up some MDF primer as apparently fablon doesn't stick to bare MDF as the wood soaks up all the glue.

So I got home this weekend and cracked straight on with priming the cabinet.   Not too difficult with suitable application of masking tape and an old curtain to shield the floor.  Only took a couple of hours including drying time.


Then it was on to the fun stuff - applying the fablon.  Mrs Blakey is a bit of a wallpaper whiz so I have to admit I let her do most of the tricky stuff. 


We did it all properly - taking all the speakers out, the coat hooks off, and the power sockets unscrewed so we could get all the fablon underneath all these bits.


This fablon covering means that the cabinet now looks more like a real wood box than a plywood box, plus it covers up all the screw heads that were showing, and on the sides where we had two pieces of ply and a miniture gap between them it now looks like one consistent bit of wood.   I'm really pleased with the final results.


So is Mrs Blakey.

Whilst I was there I took the chance to reshuffle the interior of the cabinet as well.   I took the mains charger out of its spot in the top cabinet and moved it into the bottom section where I bungeed it in place against the wheel arch.  It's not neat in there particularly but it is out of the way and stored with all the other electricals.  Additionally we can now easily read the charge reading on the battery and have easy access to the on/off switch.    Also into the lower cabinet I moved the AC/DC transformer we picked up.  This means we can now run the 12v fridge off this 240 power source when parked up on a mains hook up or run it off the 12v battery when we have no such luxury.


Moving the charger 'downstairs' freed up a space that was begging for use so I have put the 12v kettle and tea/coffee stuff in there for now.  


Whilst I was at it I got some fablon sticky shelf stuff and added it to the removable shelf. Oh and I also cut the shelf out of MDF to replace the plywood version we had in there earlier - simply to make it a little more strong.


All in all I am chuffed to pieces with the cabinet.  It looks good, does all the things I wanted it to when I first designed it, and its all built and designed by me (with a little help from my friends!).  Very pleased!


Friday 9 April 2010

Royal Kitchen Stand

As an alternative to making my own Kitchen Cabinet, I'm thinking of just buying this Royal Kitchen Unit for £65 plus delivery.


It pretty much ticks all the boxes I was hoping to achieve with a custom built one:
  • Space to put my existing gas hob on top (plus the added bonus of a built in splash screen which will help protect the inside of the van when cooking bacon in the mornings!)
  • Space for 2 gas cylinders in the bottom.
  • Easy running of gas pipe from gas bottle to hob (it's designed to do this).
  • A washing up sink built in.
  • A worksurface built in.
  • Shelving for all my camping kitchen bits and pieces like pans and crockery.
  • Somewhere to hang kitchen utensils.
  • Portable - it is fold up and it even comes with its own carrying bag.
  • Size-wise it fits nicely into the space I have assigned it to go - opposite the sliding door.
  • Looking at the frame it should be easy to bungee it in place for driving - those aluminum poles look well capable of having bungees wrapped around them.
  • It's also probably cheaper than what it would cost me to make a wooden cabinet when you take into account the base materials, then primer and fablon (if I take the same approach as the rear cabinet).
  • Plus it's professionally made which is more than can be said for my work!
  • It can be here in a matter of days rather than the weeks it will take me to build one.
  • There is a whole range so we could also pick up a Royal Camping Wardrobe for example, at £55 plus delivery, as one of the things we found was that the back of the van was messy with clothes all over the place.
Downsides include:
  • Is it strong enough to hold everything we need in there?
  • I'll get no sense of achievement in making it myself.
  • It's not 100% customised to how I want it - although to be honest it pretty much does everything I was hoping for.
Jury is still out on this one - and I've not run it past Mrs Blakey yet either.  Anyone have any comments?  Anyone actually bought one and have review?

Tuesday 6 April 2010

Kitchen Cabinet

Whilst parked up camping this weekend we realised that the biggest pain we have at the moment is that when we arrive anywhere we have to unpack a bunch of boxes and "set up camp", and then if we want to go anywhere we need to break camp and stick everything back into their boxes again.  Also, when we stop up somewhere, in order to make a cuppa we have to get the gas hob out, hook it all up, dig out the kettle, the cups and all the bits we need.  This was not a great hassle but slightly inconvenient and something we'd dearly love to avoid when we're touring later this year.  So we decided to design a kitchen cabinet to go into the van behind the driver's seat and opposite the sliding door.   This is what we have come up with so far.

The cabinet doesn't have to be permanent like the one we built in the back.  In fact we definitely want it to be easily removeable so that we can take it out when we are not camping and easily put it back in when we go camping.  As it will be sitting where the rear seats go in the Kombi we don't want to remove the potential for having them back in so the cabinet needs to be easy to take out.    We plan to hold it in place with the load lashing points in the back and with bungees.  One bungee will go around the plinth at the base in order to pull it back into the van wall and one will go over the top at the back to pull the cabinet into the floor.   As we thought more about this we decided the bungee over the top will run under the work surface out of sight behind the main cabinet so it does the job right but is out of the way.  To remove the cabinet simply unhook the bungees and lift it out.

The cabinet will basically be rectangular.  No complicated 'following the curved edge of the van wall' like in the case of the rear cabinet.  This will make creating it shed loads easier.  I believe the wall of the van is such that just under the window is slightly further out than floor level.  So if the cabinet sits against the wall at the floor there will be a gap at the top.  The plan then is to make a worksurface on the top that overhangs the basic rectangular cabinet and thus abutts the wall just under the window.   This overhang can hide a pair of hooks at the back of the cabinet which the bungee can feed through.

The basic cabinet will be made from simple 2"x1" wooden slats, cut to the right size.   It will be walled and backed with MDF panels.  I will add a floor and shelf also cut from MDF.    By adding an MDF floor to the cabinet anything inside it will be held in place when the cabinet is picked up and taken out of the van.   This means it can be used to permanently store all the camping stuff we want in it and simply put in the shed.  When we go camping we pick up the cabinet, carry it to the van, strap it in and we are ready to go.  Simples.

I am thinking that the floor will have a 2" plinth underneath it which will be used to strap a bungee around to hold the whole thing in place against the back wall, allowing the doors to be opened when held thus.  However I'm also thinking this will look a bit untidy and be unnecessary when we are parked up, so perhaps the best approach is to not have this plinth and instead when we travel use a bungee around the front to hold the cabinet in place and also keep the doors shut.    This might be a better solution but needs some more thought.

The cabinet dimensions are determined by a few factors.  As we want to lash it in, it needs to fit between the load lashing points on the van floor, width-wise.  In terms of  depth, we want to keep two large gas bottles in here stored one behind the other.  And in terms of height we want it to fit under the window so we have full access to the window.  That pretty much defines the size.

The top of the cabinet is going to be used to make use of existing kit we own.   We looked into buying a SMEV gas hob and sink combination with a glass top to put on the top of the cabinet.  That would be sweet, but seeing as the prices are about £200-£300 for the hob and sink alone we are talking a fortune.  We already own a perfectly serviceable gas hob and want to make use of it.  In addition we'd like a sink built in.  But we don't have water tanks in the van, nor drainage so we want it as simple as possible.  As such we're not looking for anything more hi tech than a plastic washing up bowl - in a perfect world perhaps one with a lid on it.

So we are going to make the top of the cabinet out of kitchen worksurface material.  This is both water and heat resistant which makes sense as we're sticking a cooker and washing up bowl into it.  Into that surface we are going to cut rectangular holes and drop our gas hob and washing up bowl into those holes.   Most washing up bowls come with a lip on them which is what will stop the bowl dropping through into the main cupboard.   Unfortunately our cooker does not have a lip so we're going to have to modify the cooker slightly to add some sort of lip to stop it dropping through.  We will let the gas pipe drop through though, down into the cabinet to where the gas bottles will be stored, so it can be connected up underneath out of sight.   We shall make the worksurface as deep as we can sensibly do without getting too intrusive to the space in the van, so that there will be some space in front of the hob and sink to use as a typical work surface.

The cabinet will be designed to store two large gas bottles, our pan set, a complete set of plastic camping crockery and cutlery, our water bottle, washing up stuff, the Blackcat gas heater (till we fit a diesel heater) and any spare food we bring.  I would like to add a cutlery draw into it somehow but this needs to be thought of some more.

Finally, on the outside we'll add some hooks to hang kitchen utensils and some of those plastic push in tea-towel holders so we have a handy place to put the washing up stuff.  The two doors on the front (side opening) will have netting added to the insides as this makes excellent lightweight storage for all manner of odds and ends.

Edit:  Another thought after looking at this unit:  washable rollers instead of doors on the front.  Nice touch.
I'll post more thoughts on this as I have them and of course document it here when we come to build it.

More Thermal Screens

After camping this weekend with thermal screens for the cab it was clear just how handy these things are.   They're not cheap but they are easy to fit using suction cups, they completely cut out the light and they are great insulators too.

I called Just Kampers, who we bought the original cab screens from but they don't do a set for the back of a T5 so I had to look around.  The cheapest other option I could find was these from South West Campers so I've ordered a pair of side windows and a set of barn door windows for a total of £105.   They are due to turn up tomorrow and we'll make use of them when we take the van to Dorset camping in a fortnight's time.

Oh, I also ordered a 12v kettle whilst I was at it.   I'm thinking that can sit in the van at all times, along with a little box of tea, coffee, sugar and coffee mate packets and a spoon. I need to keep a small flask of water in the back too.  That way I always stop and make a cuppa - even if the 12v kettle takes 20 minutes to boil!

Monday 5 April 2010

Easter in Kent

This weekend me and Mrs Blakey took the van off to Kent for Easter.   The weather forecast was shocking but we couldn't wait to try out the van with all the latest upgrades!

We packed up the usual camping stuff in boxes in the back of the van, all held in with bungees and set out on Friday morning.  We arrived at the campsite at Manor Court Farm in the pouring rain and were shown to our pitch.  As we had ordered a mains hook up we were directed to the 'tennis court', which appeared to be an overgrown field which was once a tennis court.   We were there with a lovely looking splitty and no one else.  The rain had driven everyone else away.

A quick check with the spirit level showed the old tennis court was flat as a pancake so we parked with the side door furthest from the gale and rains and popped the roof.


A few minutes later we had all the boxes unpacked, the front seats swivelled, the mains hookup connected, the table up and we were settling in.  Kettle was put on, tea was made, cookies were opened - and we were on holiday.  


It was lovely to just pop the roof rather than have to faff about pitching a tent - especially as it was chucking it down outside at the time.

That evening we went to the pub and on returning had our first experience of sleeping in the roof.  It was a little tight in there and the matress was not very comfortable, but it was still easier than a tent.  It was very cold though but it was only just above freezing outside so was no worse than a tent would have been.

The next day we headed into Tunbridge Wells.  Sorry, I mean Royal Tunbridge Wells. Very posh.  It took us a while to find any normal shops. All we could find were expensive boutiques, expensive cafes and estate agents that advertised houses with no prices.  You know - the sort of place that if you have to ask the price you can't afford it.   Lovely place though.   Oh and eventually we tracked down a camping shop and even a surf shop.  Not bad.

From there we set off to Bewl Water to have lunch - sandwiches from Tesco.  It's supposed to be quite lovely there but when we got to the car park it was going to try and charge us £4 per person just to park up.   Seemed a bit steep and as there was Scotney Castle, a National Trust castle about 200m away we figured we'd go and park there for free (we're members) and have our lunch there instead.


Whilst there we took a stroll around the two houses and the grounds as the sun made a rare appearance for the afternoon.


That evening we took advantage of the major reason for going to Manor Court Farm - the fact they let you light your own fires in the grounds.  There's not much that beats a few ales and a real fire outdoors. Sweet.


The next day, Sunday, we headed off to another local attraction, Bodiam Castle.   This is a really impressive place. A 12th century construction that has survived pretty much intact to this day.   I'm a great fan of olde english historical buildings and this place ticked all the boxes for me.  Loved it.


Oh and the fact we could pull up in the car park, pop the roof up on the van and sit and eat our sandwiches and put on a quick cuppa somehow made it all the more enjoyable.  We're determined to use the roof like that every chance we can!

This weekend we really had a chance to trial the new additions to the van.  Overall I'm happy as Larry about the changes we've made.  Sitting in the back of the van at night with the thermal screens on the windows, sipping a hot cuppa which we'd made on our gas hob, with built in LEDs providing the light, tunes from our iPod plugged into a normal 240v socket and thinking of the bottle of white chilling in the 12v powered coolbox in the cabinet next to me, really made me feel like I was in a fully kitted out campervan. 

Yet I got home, put the camping boxes in the shed and suddenly have a normal van I'm going to drive to the office tomorrow morning.  And it's all ready for me to throw surf boards and mountain bikes in the back without destroying all that furniture you'd have in there if it was a real campervan.

And I think it looks pretty cool too.


Stoked.

Electricals Finally Finished

After much head scratching, research, asking members of the Brickyard (over and over and over in some cases as I tried to get my head around what they were telling me), we have finally got the electrics in the van sorted.

We now have a 70 AH gel leisure battery installed in the back of the van.  Installed next to it is the mains charger which allows me to charge the leisure battery when we are near a mains.


Attached to that is an intelligent split relay charger which charges the battery when the van is in motion but stops anything from draining power from the starter battery.   This box also provides a fuse box into which all manner of 12v items can be wired.   


We have a couple of LED lights wired into the split relay charger and two double 12v sockets, one inside the cabinet and one outside, providing access to the back of the van.

Finally we also have a mains hook up, located hidden away under the rear of the van, which provides a double 240v socket to the inside of the van and a single 240v socket inside the cabinet which I use for plugging the Ring charger in when hooked up on a campsite.  This is protected with a trip switch.


CMC fitted all this stuff when they did the carpeting and roof and again I'm extremely pleased with what they have done.  The wiring was all neat and well hidden.  The mains hook up is invisible inside the van.  All the wires run neatly and out of the way.


All this neatness means that the bottom section of my cabinet, which I expected to be full of electric wizardry is still fairly empty.   So I've stowed my handy 12v vacuum cleaner, a 75w inverter and my handy box of bungees in the back and still have loads of space for putting bits and bobs in here when I want to.


I need to make a special mention here for CMC. I gave them a big wordy description of the configuration I wanted and went away hoping that they might vaguely get something like I'd asked for. It was quite a bespoke set up really and involved fitting everything into my cabinet. I went to pick up the van 4 days later and was blown away with how good a job they had done of the electricals. It was exactly as I'd asked and neater and more professional than I had expected or hoped for. Great job.


After all this I now have a leisure battery which powers two double 12v sockets.  It is automatically recharged when driving.  On top of that when I park up in a campsite with a mains hookup I can plug into the mains and this gives power to a double 240v socket inside the van and a single 240v socket inside the cabinet.   Into this 240v socket I plug my mains charger and as such when parked up this way the leisure battery is also charged off the mains so effectively all the 240v and 12v sockets are powered from the mains this way.

Really pleased with the results.

Carpeting

As well as fitting the Reimo Roof, CMC also carpeted throughout the van.  The always carpet the shelf of the roof when putting it in so I figured rather than try and match the colours and match the fit it would be best to simply pay them to carry on the carpeting right to the floor.  I chose charcoal grey carpet which whilst dark I think compliments the look of the black van really well.


CMC take the approach of not carpetting every single inch of the metal work.  I wasn't entirely sure how that would look when it was finished but actually I'm really pleased with the resulting look. 


They did a top job of it as well, carpeting both wheel arches, one of which was behind the cabinet I'd built in the back, and of course carpeting around the new roof supports.    I'm really pleased with the end result.


Adding it to the job of insulating the van that I had already completed last year and there is a definite reduction in both road noise and an improvement in the warmth of the van.  Again, I'm really pleased with the job CMC have done.

Reimo Roof

On Thursday evening we picked up the van from Concept Multi Car in Hythe, Kent where the new Reimo Roof had been fitted.   I ordered a Reimo roof with colour coding to match the pearescent black paint of the van, and an internal strengthened roof bed.   They had the van four days and during this time also fitted my split relay charger, a mains hook up, two LED lights are carpeted the van throughout.   And I'm really, really pleased with the results of all these upgrades.

With the roof down the profile of the van is altered slightly.  To the trained (i.e. vanarack) eye it's easy to spot the van has an elevating roof but it doesn't change the profile very much really.


There is a slight rubber lip added to the van above the windscreen which deflects the wind over the roof and, once I'd figured out how to secure the roof nice and tightly shut, I have had the van over 80 mph without any real noticable increase in road noise due to this little rubber cleverness.


The back of the roof doesn't quite go all the way to the rear spoiler which looks a little strange but I can live with that.


All in all I like the roof's asthetics when closed.

Opening the roof is a really simple task.  It is held down with two straps on the inside which I'm well used to from years of strapping surfboards to the roof of my old car.  Once these are undone a gentle push upwards is all that is needed to open the roof which slides upwards, pushed and controlled by the gas struts built in.

Once up, from the outside the van now looks like a good old campervan - a look I have always loved.


The interior has three openings.  The front one is plastic and transparent, and can be opened when it's raining or windy as it is sealed.  This lets a lot of light fall into the van without letting in any rain or wind.   It also gives you a nice view out of the bedroom upstairs.  The side openings are simply netted behind the zip up panel, so these are useful when it's warm to ventilate the van.  It was cold and rainy this weekend so we didn't use them much, apart from when we were burning the bacon!


The roof comes with a nice shelf all the way around it and we found this handy for popping all sorts of stuff on when camped up.  You have to take it all off when you bring the roof down to travel but you can keep things on there with the bed up or down, which made it a handy 'bedside table' sort of surface as it was easily reached from the bed.

The bed is an optional extra but for us was one of the main reasons for getting the roof added.   It was really too dark this weekend to take proper photos of the bed section.  It comes with a built in matress which is thin and not very comfortable to lie on all night long.  Also, although the foot end of the bed is raised, at only 5'9" tall I found that if I lay on my back my feet would hit the bottom of the roof.  Not great.  Also, I couldn't quite lie on my back and bend my knees as the roof was too low at knee position.   This basically restricted me to sleeping on my side - and when I awoke I found my hips were aching from the thin matress.   We need to think about how to make the whole experience of sleeping in the roof a little more comfortable.   I'll be posting about that on the BrickYard soon and seeing what others have come up with.

When not sleeping the bed pushes up into the roof.   The very back section of the bed doesn't push up, and the bed folds in a clever way which leaves space up in the "loft" at the back of the bed.  This space is big enough to store your duvet, pillows, sleeping bags and anything else you want whilst the bed is up.  Very handy.

The major plus for us was that when parked up with the roof up you could now stand in the van.  Absolute bonus and what we really wanted.  We can now get changed in the van without breaking our backs.  We can cook on our gas cooker without getting stuck bent over.  It was a real bonus.

Putting the roof back down for driving is something you have to take care over.  I know of a few people who have torn the canvas on the sides of the van by dropping the roof too quickly and having the canvas billow out and get caught in the hinges that hold the roof up.   The secret is to drop the roof to about 6" and then pull all the canvas in by hand at that stage, then drop it the last bit.   Not a great hassle to be honest.  It also helps to have a side door open to let the air out when you drop the van.  No problems for us with this over the weekend.  And when down the roof looks nice and neat.


Securing the roof is simply a case of pulling some straps tight.  It's really not difficult once you've figured out how to do it most efficiently.  And with it pulled really tight the road noise is negligable.

All in all I'm delighted with the new roof and I think as long as I can solve the comfort issue with sleeping upstairs we will have many fun weekends in the roof!

Oh, and getting out of the bed head first is not recommended!